Reese's Hot Cocoa Bombs

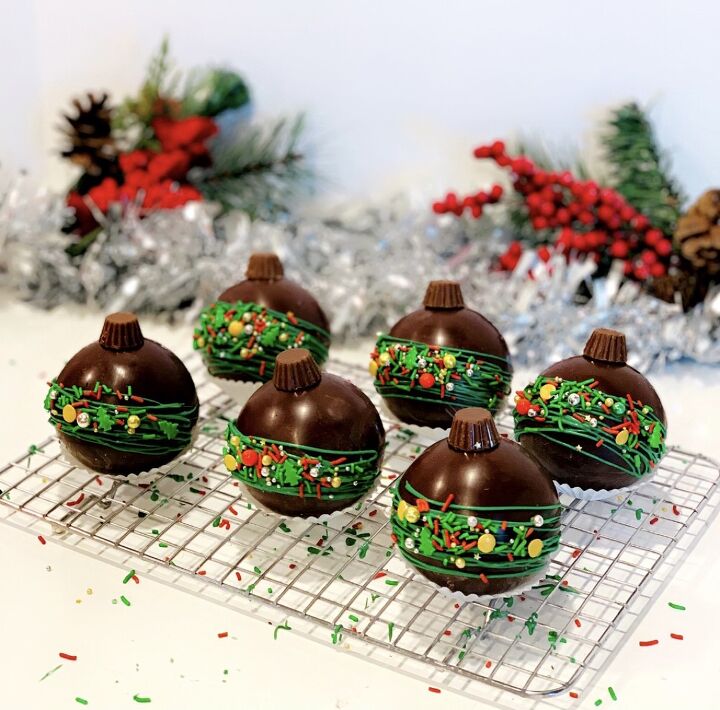
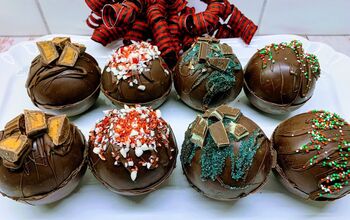
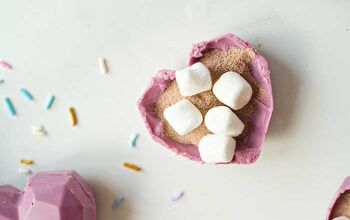
As a newly-converted hot cocoa bomb addict, as soon as we make a few rounds of the classic chocolate flavor, of *course* we start branching out into different flavor additions! Right after peppermint bark… I opted to use mini Reese’s cups to make bombs that looked like ornaments, and add some peanut butter to the inside of the bomb! OH my gosh; so cute, so fun and SO good!
You only need a few supplies – a half-dome silicone mold, semisweet chocolate, hot cocoa mix, peanut butter, and mini marshmallows! Green candy melt drizzle + sprinkles are optional but recommended. ;) As much fun as these are just to make, I think filming pouring milk over the bomb miiiiight have been my favorite part! I recommend aiming your pour at the seam to make the bomb come apart and melt more quickly.
These are SUPER easy to make – and they make great Christmas gifts! Recipe below!
Of note, tempering your chocolate is optional but recommended – do not panic; you can do this in the microwave! I had some trouble tempering my semisweet chocolate – until I used SugarGeekShow’s microwave tempering method! (I also found this spatula with a candy thermometer in the center super helpful for tempering!)
Reese's Hot Cocoa Bombs
Recipe details
Ingredients
Hot Cocoa Bombs
- 1 ¼ cup (8 oz) semisweet chocolate chips (I also found this spatula with a candy thermometer in the center super helpful for tempering!)
- 6 teaspoons peanut butter
- ¾ cup (12 Tablespoons) Hot cocoa mix
- 1 cups mini marshmallows
- Silicone Hot cocoa bomb mold – I love this mold I bought on Amazon! 6 mini Reese’s cups ¼ cup (2 oz) green candy melts – for decorating Piping bag – for decorating Sprinkles – optional but recommended! I used FancySprinkles ‘Rockefeller’
Instructions
Hot Cocoa Bombs
- I recommend tempering your semisweet chocolate – do not panic; you can do this in the microwave! I had some trouble tempering my semisweet chocolate – until I used SugarGeekShow’s microwave tempering method! The spatula I linked above was SUPER helpful! If you don’t want to temper your chocolate that’s 100% fine; just know that you make get a dull dusty look to the outside of your shells. Buuut considering they’re just going into hot milk – not really a big deal! ;)
- Coat your silicone molds – make sure to make the coating thick enough that the mold doesn’t show through the chocolate. Cool until completely solid, and remove the shells from the mold. Repeat the process to make the remaining 6 shells unless you’re smarter than I am and purchased 2 molds. ;)
- Now you’re ready to put them together!
- First – you need a way to melt the edges of the shells slightly so that they’ll stick together. I put a frying pan on the stove on low heat, and first melted the edges of the first 6 of my shells for 1-2 seconds until they evened out. Add 1 teaspoon of peanut butter, 2 tablespoons of hot cocoa mix, and as many marshmallows as will fit to the shells with the evened edges. Melt the edges of the remaining chocolate shells, seal the two edges of the shell together while the chocolate is still warm, and allow them to cool.
- Now to decorate! Melt your candy melts in 10-second intervals in the microwave, and transfer to a piping or zip-lock bag (don’t overheat or they can burn – smelly and you have to start over). Drizzle candy melts over the hot cocoa bombs and sprinkle with sprinkles – and you’re done! Enjoy – or bag as an awesome Christmas gift!
Tips
- Make this recipe? Let me know how it went - or find me on Pinterest or on Instagram and tag @IntensiveCakeUnit in your photo!








Comments
Share your thoughts, or ask a question!
Why are there no directions for tempering the chocolate?