


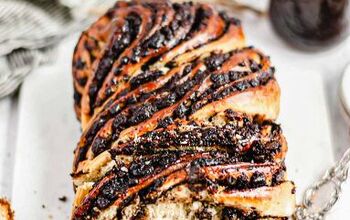
Chocolate Espresso Babka
· Print Recipe
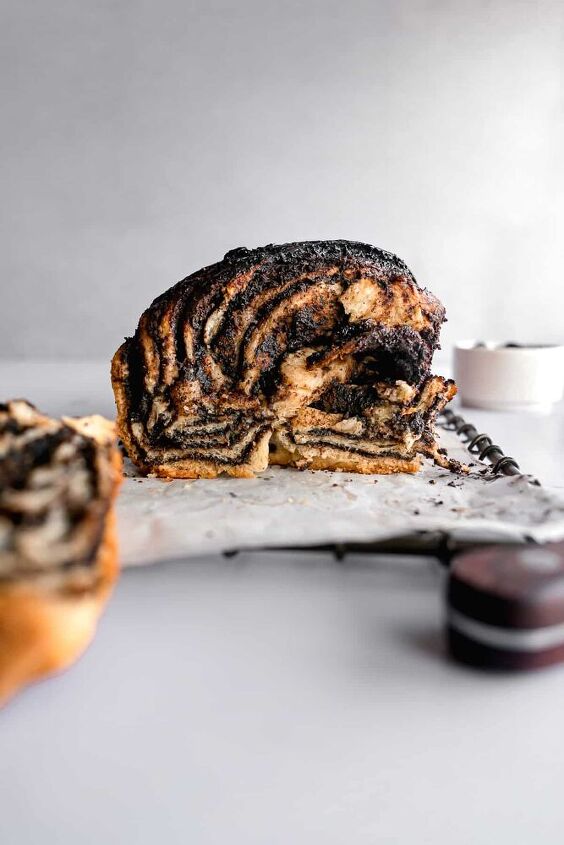
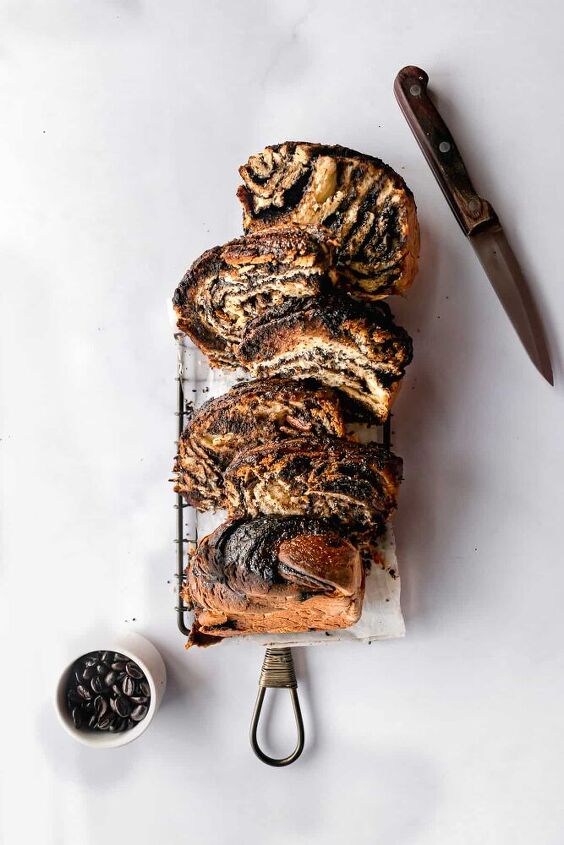
This chocolate espresso babka is made with super-soft brioche dough and packed with a rich chocolate espresso filling. This bread has a soft & pillowy interior with a shiny crunchy top. If making a babka intimidates you, I’ve included step-wise photos and trust me it gets easier as you make it. Instead of making the entire thing in one day, you can make part of it a day or two before so it is ready to be baked for your brunch in the morning. It will honestly make the perfect Sunday brunch meal for you and your family!
- Active Dry or Instant Yeast: Once the yeast is added, you should wait for it to be activated before proceeding. In case of instant yeast, it will activate immediately and you will have a foamy & bubbly mixture. However if using active dry yeast, you will need to let the mixture rest for around 15 minutes before the yeast is active.
- Granulated Sugar: A small amount of sugar is added to the dough. This acts as food for the yeast which helps to activate it and become foamy & bubbly.
- Milk: You will need warm whole (full-fat) milk. Warm temperatures are also required to activate the yeast. Temperatures required are between 110ºF to 115ºF ideally. Anything hotter than this can kill your yeast.
- Eggs: Use large eggs and bring them to room temperature before mixing in. Eggs strengthen the binding of your bakes and also add moisture. Having your eggs at room temperature makes it easier to incorporate them and allow them to mix thoroughly in your brioche dough. A good way of doing this is by letting them sit in a bowl filled with room temperature water for around 10 minutes or until they come down to room temperature.
- All-purpose flour: I highly recommend weighing all your ingredients using a kitchen scale for accurate recipe results. If you’re using cups, don’t scoop your cup into the flour. Spoon the flour into your cup and level it off with the back of a knife.
- Unsalted Butter: You will need cubed butter for making this dough. Add in the cubes one at a time while kneading the dough. You will also need some for the chocolate espresso filling. It is very important to have your butter at room temperature. You can ensure this by lightly pressing your finger on the block of butter. It should slightly leave an imprint. I also prefer to use unsalted butter because salted butters have varying amounts of salt content in them and it is always a good idea to add it on your own and avoid your bakes from being too salty.
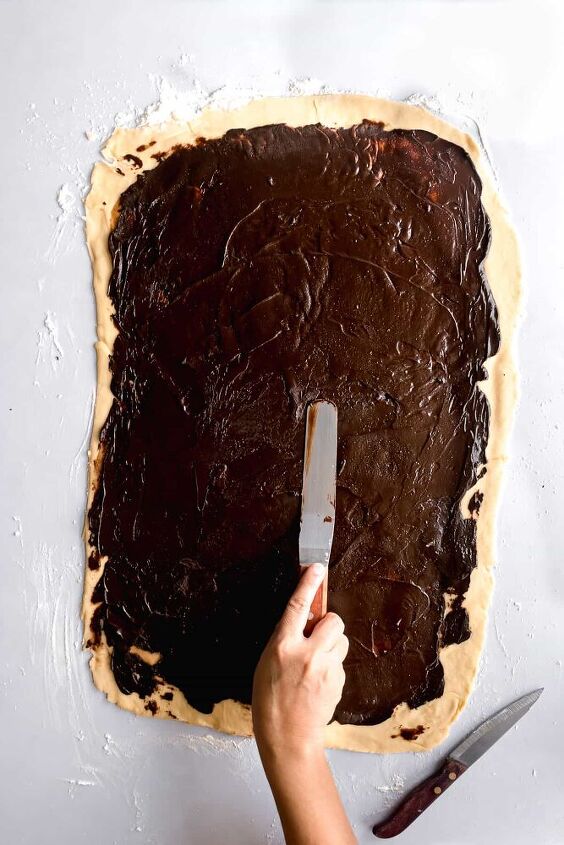
- Chocolate: I highly recommend using good quality baking chocolate chips or chocolate bars (I use callebaut) to ensure the best flavor. This will also help you get a very silky and shiny chocolate ganache.
- Espresso Powder: Not only does this add a coffee flavor to your filling, but also helps to enhances the flavor of chocolate in it.
- Powdered Sugar: You will need to add some of this to your filling as the espresso powder will make it slightly bitter. Powdered sugar is easier to incorporate as it mixes well. This also helps to spread the filling smoothly on the dough.
The windowpane test is a very effective way of knowing if the broiche dough has developed enough gluten in the kneading process or not. If not, you’ll need to continue kneading until it does. However, it is also important to do this test properly. To check if the dough is ready, take a decent size piece of the dough and gently spread it out until you can see the light through it. However if the dough tears during this process, it is not ready. Mix for another minute and check again until it passes the test.
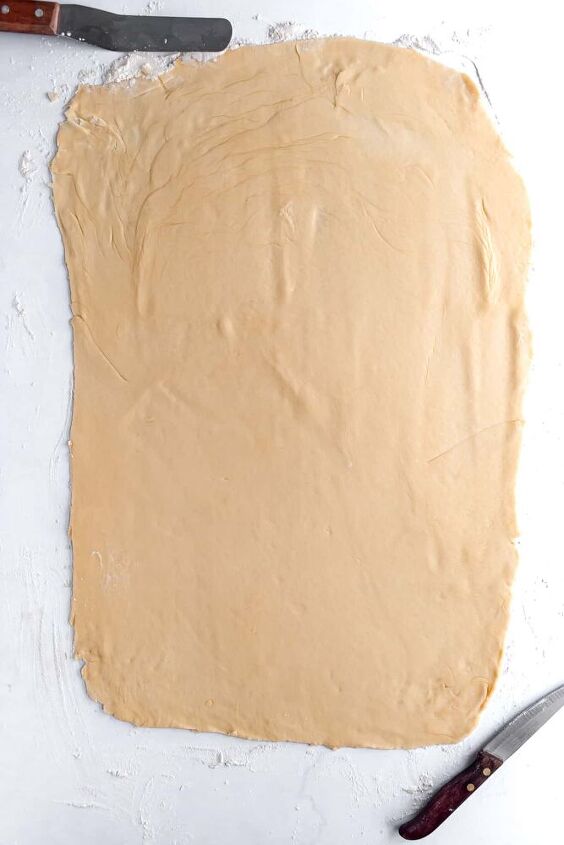
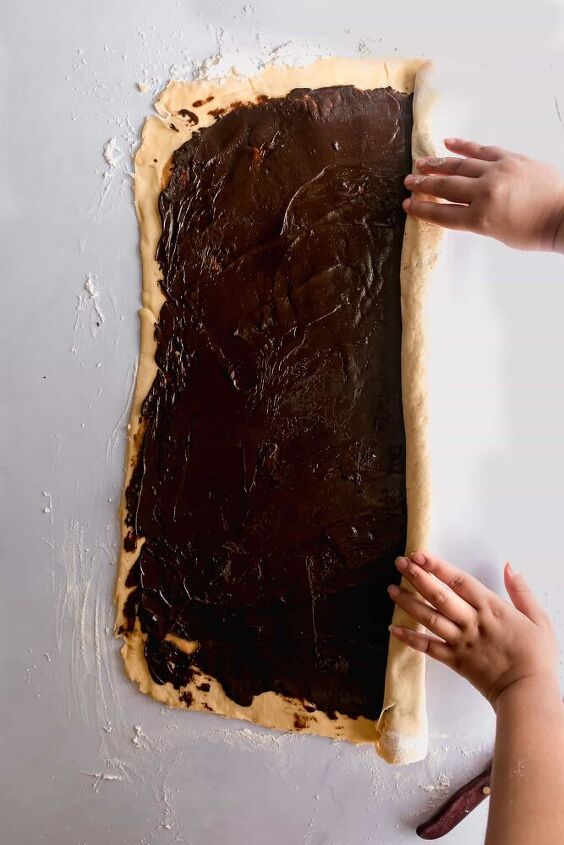
How to knead the brioche dough properly?1. Once the yeast has been activated and the wet ingredients are well incorporated, pour in the wet ingredients into the dry and knead until all of them are completely incorporated.
Bulk fermenting is the process of allowing the dough to double in size while proofing is allowing the shaped dough to become puffy just before baking. At a minimum, both steps require an hour in warm temperature conditions. Alternatively, you can do any one of them overnight by letting the dough chill in the refrigerator for 8-16 hours. I don’t recommend proofing for more than 16 hours in the refrigerator. If bulk fermenting or proofing in the refrigerator, make sure to cover it with a plastic wrap so the dough doesn’t dry out.
- Mini Blueberry Chantilly Cheesecake Tarts
- Rainbow Funfetti Vanilla Layer Cake
- Chocolate Orange Madeleines
- You should do both bulk fermentation & proofing for atleast an hour in a warm environment or for 8-16 hours in the refrigerator. Anything more than this will lead to over proofing. Always cover with a plastic wrap while proofing the dough.
- Brush the babka generously with egg white to help it brown evenly and give it some color.
- I highly recommend investing in an oven thermometer and a kitchen scale. Baking at accurate temperatures and weighing your ingredients correctly ensure that you can replicate the recipes perfectly and enjoy the best flavors.
Happy Baking!
Chocolate Espresso Babka
Recipe details
- 1 loaf
- Prep time: 30 Minutes Cook time: 30 Minutes Total time: 1 hr


Comments
Share your thoughts, or ask a question!
Can this be made gluten-free in any way? Almond flour?