Twisty Cinnamon Rolls

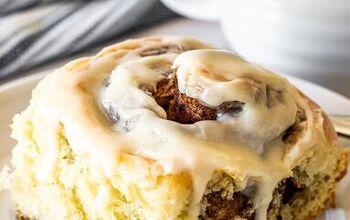
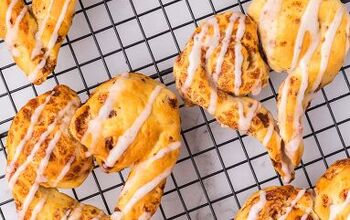
This Twisted Cinnamon Roll Bake is the absolute answer to every one of your cinnamon roll dreams, easy to bake, all in one pan.
So. Ok. Yeah. This...this Twisty Cinnamon Rolls bake is unreal. Un-freakin'-real, people.
Like right now you're thinking a. this is not real and b. there's not a single chance in hell I can copy that. Both those are false. You do not have to be any kind of advanced baker to achieve this gorgeousness, I swear and promise.
It may seem like a lot, this recipe, but in actuality, going through the process of making it, it's not; it is, in fact, very easy. It's nearly foolproof so don't be intimidated in the least!
It does take a bit of time and effort but truly, it will be so worth it once you take that first bite.
Roll the dough out and add the filling.
The filling is definitely adaptable here meaning you can add things like nuts or other spices. Just be sure to avoid overloading the dough with too much extra stuff.
Slice the long roll into four pieces about 9" long each.
To get the twisty shape, take one log, slice it down the middle lengthwise all the way through and let the sides fall open. Pinch the two cut pieces together at the top then twist.
Make about 3-4 twists total, not too tight so there's room to expand.
Lots of tips on this as well as other aspects of the recipe, so drop by the post here for more info.
And voila! Twisted dough! Very easy.
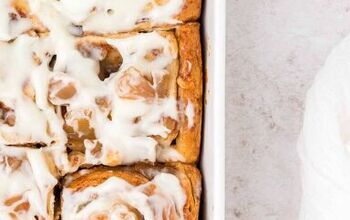
Set the twisted dough rolls in your baking pan and bake.
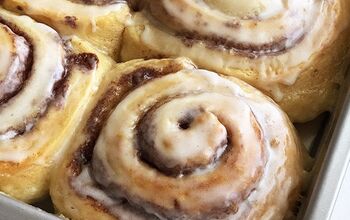
Wow! What a show-stopper!
There's an icing for this but, and this was a jaw-dropper because my husband is extremely pro-icing, like don't ever leave it off, but he stated, with eye-popping eyes of baking appreciation, that this does not need icing at all. And he is absolutely right. So in my personal opinion, skip the icing entirely.
But see? So worth it, right?! Goodness this is so outrageously delicious. I think I have to shuffle off and make some right now.
Be sure to swing by The Bake Dept for more details on this recipe, tips, and fun by clicking the link next to my profile picture below the recipe card.
Twisty Cinnamon Rolls
Recipe details
Ingredients
Dough
- 2 large eggs, room temp (or slightly cool is fine)
- 1 cup (237 ml) milk, any type, slightly warmed
- 2 1/4 teaspoons (7 g, 1 packet) instant/rapid rise yeast
- 1/4 cup (50 g) granulated sugar
- 8 tablespoons (113 g, 1 stick) unsalted butter, cubed
- 3 1/2 cups (420 g) cups all-purpose flour
- 1 1/2 teaspoons (8 g) kosher salt (2 teaspoons or 5 g if Diamond brand)
Filling
- 3 tablespoons (43 grams) salted or unsalted butter, melted
- Pinch or two of salt (if butter is unsalted)
- 1 cup (190 grams) dark brown sugar
- 1 tablespoon (8 g) ground cinnamon
Icing (optional)
- 1 8-ounce (225 g) block cream cheese, room temperature
- 2/3 cup (80 g) powdered sugar
- 1/2 teaspoon (3 g) vanilla extract
- 1 to 2 (15 to 30 ml) tablespoons milk or cream
Instructions
Dough
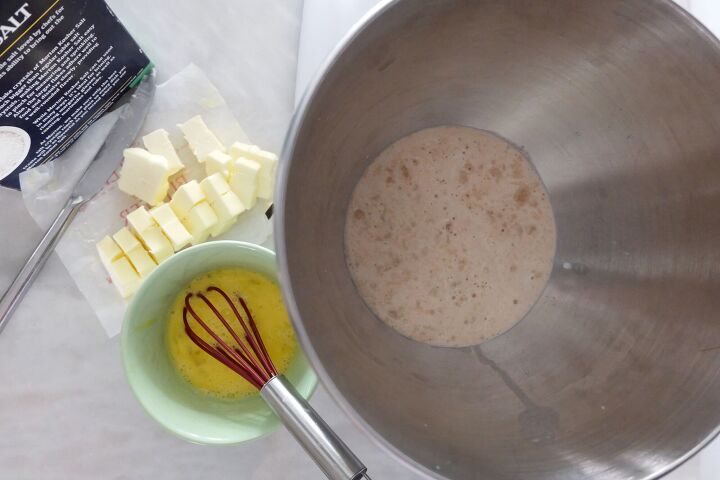
- To the bowl of a stand mixer, add the 2 large eggs and whisk lightly. Next add the warmed milk, yeast, sugar, and 1 cup (120 g) of flour, stirring to slightly combine.
- Add the cubed butter and the remainder of the flour. Place the dough hook onto the mixer then switch it onto low speed. With the mixer running, add in the salt.
- Let the mixer run for about 5 minutes to knead the dough and incorporate the butter. The dough will be quite sticky.
- Lightly spray a bowl with cooking spray then add the dough, cover with plastic wrap and let rise for 1 1/2 to 2 hours, or close to doubled. Most likely it will hit this point near 1 1/2 hours after which place the dough in the refrigerator for 1 hour.
- The dough can be used after 1 hour or can stay in the refrigerator up to 2 days and can be used any point between.
Filling and Assembly
- Melt the 3 tablespoons (43 g) of butter and set aside. Mix the brown sugar and cinnamon together in a small bowl and set aside.
- Spray a 9"x13" baking pan with cooking or baking spray or otherwise grease and set aside. Set out a baking sheet that will fit inside the freezer.
- Remove the dough from the refrigerator and pour out onto a well-floured surface. If counter space is short, slice the dough ball in half otherwise keep the dough ball whole.
- Flour a rolling pin and while continuously adjusting flour to avoid sticking, roll the dough out to about 12"x30" (or 12"x15" if rolling in half pieces). If the dough pulls back, let it rest for a few moments and try again. Try to square the corners as best as possible.
- Brush the butter evenly edge to edge (or half of the butter on one half of the dough) and sprinkle the brown sugar mixture evenly edge to edge atop (or half of the brown sugar mix on half of the dough).
- From the 30" edge (or the 15" edge), roll the dough into a giant log. Shape the rolled log so it's generally even, stretch the log out to 36" (or 18" for a half), and square up the ends with your palms.
- Slice the 36" log in half then slice each half into halves (for the half piece, slice it in half). You'll end up with four 9" long pieces. Set the pieces on the baking sheet and place in the freezer for 15 minutes.
- Begin preheating the oven to 375° F (190° C).
Shape and Bake
- Take the baking sheet out of the freezer and place one 9" piece on the counter. With a serrated knife, slice the log in half down the long way and let the halves fall to the sides, cut sides up. Spin one half around 180° keeping the cut side up.
- To shape, with one hand, hold the two ends together and with the other hand, bring one half over the top of the other to begin the twist. Pull the piece underneath up and around to continue twisting, and continue to twist for about 3-4 total or not too tight. Tuck and shape as necessary then place in the greased baking dish with the cut ends facing up.
- Repeat with the remaining pieces then let the filled pan rest for 15 minutes.
- To bake, set the pan in the oven for 30-35 minutes. The logs will have risen, look golden brown, and will reach an internal temperature of 190° F (88° C).
- Remove the pan from the oven and let cool before serving. To serve, slice as desired.
Icing (optional)
- Combine all of the icing ingredients in a food processor or whisk together by hand. It will be thick so add more milk to reach a thinner consistency as desired.
- Serve on the side for dipping.
Tips
- Be sure to swing on by The Bake Dept (thebakedept.com) for extra tips, tricks, inspiration, and more terrific recipes!








Comments
Share your thoughts, or ask a question!
I want to make this, but I do not have a stand mixer... how can I make this then...
Thanks pam
Thank you both, I will try to do this too...