Asiago Cheese Bread No Knead

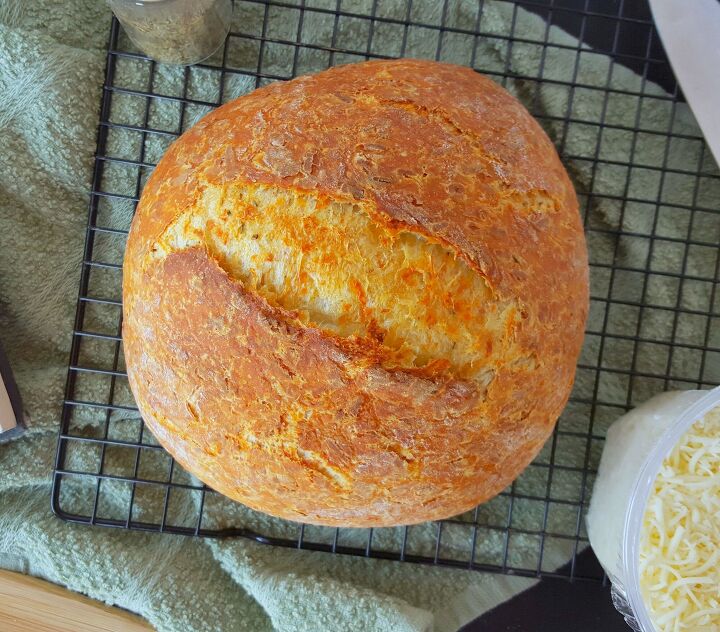
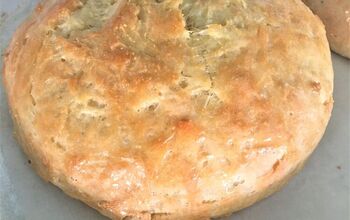
This rosemary asiago cheese bread is amazing. The flavors of the bread come through so well. The bread itself is fluffy but filling. The crust has a nice chew to it, and is full of flavor. It’s a great bread by itself or paired with other things. I've made an delicious grilled cheese with this bread as well. It would also be amazing as a dipping bread with soup.
This bread is not difficult to make. The hardest part of it all is the waiting, but no matter what you have to wait. I like to make this bread in the afternoon. That way it will be ready to bake the next morning. Once you start fermenting your dough, do not look at it. I know it’s hard, but your bread will suffer if you do. When you ferment, you want your dough to stay in a controlled environment temperature wise. Continuously removing the bag will cause the temperature to change, and can cause your dough to not rise as well. Fermentation is important because it gives the yeast time to grow, and it gives flavor to your bread. The longer you ferment the more flavor your bread will have. One more thing about making bread is that your yeast is sensitive. Certain ingredients can kill yeast, and cause your bread not to rise, especially salt. SALT WILL KILL YOUR YEAST. Don’t let your yeast touch anything, but the water and flour. Think of the flour like a shield for your yeast until its time to mix everything together.
Asiago Cheese Bread No Knead
Recipe details
Ingredients
- 10 oz Asiago Cheese (Shredded)
- 2 tsp Dried Rosemary
- ¼ tsp Instant Yeast
- 3 c All-Purpose Flour
- 1 ¼ teaspoon Salt
- 1 c + 3 T Warm Water
- 1 c Bread Flour
- 1 large Plastic Grocery Bag or Plastic Wrap
Instructions
- In your bowl add the yeast and warm water and sit it aside while you get the rest of your ingredients together.
- In the bowl with your yeast add your all-purpose flour.
- Now add the cheese, rosemary, and salt on top of the flour. Don't add the salt directly on top of your yeast. Salt will kill the yeast, and your bread won’t rise.
- Use a spatula to mix the dough. If your dough is too dry, add a tablespoon of water at a time until it’s a little sticky. The dough should be loose and will not be smooth.
- Oil the bottom and sides of another bowl, and place your dough inside.
- Take a plastic bag (I like to use grocery bags) and put it over the bowl. Tuck the the bag under the bowl so that the entire bowl is inside the bag and covered.
- Let the dough ferment for 18 hours in a warm place. Your dough should be double in size at the end of the 18 hours.
- Now lightly dust your work surface with bread flour.
- Pour your dough out of the bowl onto the floured surface.
- Fold the dough over itself four times, and let it rest for 15 minutes. Cover the dough with the plastic grocery bag while it’s resting.
- Now mold the dough into a ball.
- Place your dough seam side down on some parchment paper. If your dough does not have a seam its ok.
- Cover up the dough again, and let it rest for another two hours.
- When you have 30 minutes left, preheat your oven to 450ﹾ. Take a oven safe pot with a lid and place it in the oven as it’s preheating. Leave the lid off for now.
- When your two hours are up uncover the dough and cut a shallow line in the top of your dough. This will help your dough expand. If you don’t make the cut the dough will do it for you, and it may not be as pretty.
- Use the corners of the parchment paper to lift and lower the dough in the pot, and bake it for 30 minutes with the lid ON. Then bake for another 15-20 minutes with the lid OFF. You want your bread to be a nice golden brown.
- Use the parchment paper to lift the dough out of the pot. Let your bread cool completely before you cut it and enjoy!











Comments
Share your thoughts, or ask a question!
I would like to know if your think this recipe can be made with the gluten free flour mix
Can I use a bread maker for this recipe?